-
Japanese Knives
-
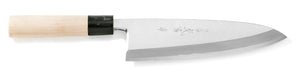
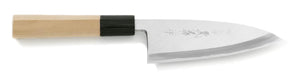
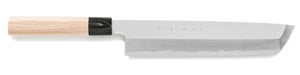
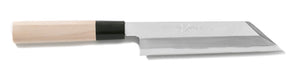
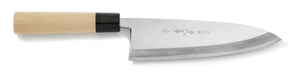 Deba Knives
 -
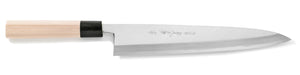
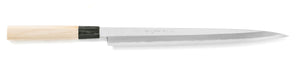
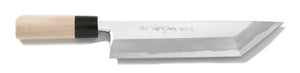
 Yanagiba Sashimi Knives
 -
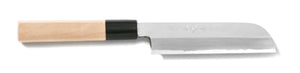
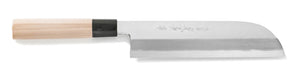 Usuba Knives
 -
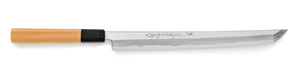
 Sakimaru Takobiki Knives
 -
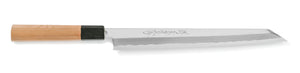 Kiritsuke Yanagiba Knives
 -
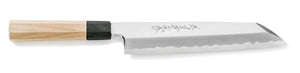
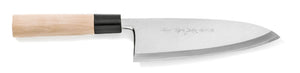
 Wa-Santoku Knives
 -
 Kiritsuke Knives
 -
 Mioroshi Knives
 -
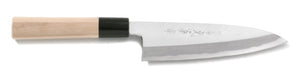
 Aideba Knives
 -
 Funayuki Knives
 -
 Fugubiki Knives
 -
 Takobiki Sashimi Knives
 -
 Aji-Kiri Knives
 -
 Baran-Kiri Knives
 -
 Hamo Honekiri Knives
 -
 Fugu Deba Knives
 -
 Unagi Saki Knives
 -
 Mukimono Knives
 -
 Kenmuki Knives
 -
 Sobakiri Knives
-
- Western Knives
- Damascus Knives
- Home Kitchen Knives
- Accessories
- Gifts
- All Products


Knife Care
How to Take Care of a Japanese Knife - For Domestic Use
In this section, we will explain how to properly maintain your knives at home. Correctly caring for your knives ensures they perform at their best and last for years to come. Be sure to read the following tips to avoid common issues and gain the maximum return on your investment.
To Prevent Knives from Chipping
Our knives are generally made from carbon steel. They are sharpened and shaped before they're forged. To ensure durability, the internal structure must be well quenched. Thus, the surface of the knife must be harder than necessary. As a result, new blades can chip relatively easily if you're not careful. To avoid chipping, be sure to handle new knives gently. After they go through two or three cycles of use and sharpening, their condition will adjust, and they will be less prone to chipping. For all knives, careful use with mindfulness will ensure your blades serve you well for many years.
To Prevent Knives from Rusting
If carbon steel knives start to rust and are left untreated, the rust will eat into the steel, and the blade will be prone to chipping regardless of how it is sharpened.
Stainless steel knives do not usually rust red. Instead, they get black rust spots which penetrate into the steel, resulting in tiny holes forming. If they appear near the edge of the blade, the knife will become blunt.
To avoid rust, it is essential to clean knives thoroughly and dry them well. Use a moderate detergent and wipe them dry with a dry cloth. If you rinse blades with lukewarm water, they will accumulate heat, which helps them dry faster.
New carbon steel knives tend to rust more easily, so be particularly careful to dry them thoroughly. Of course, be sure to avoid touching the edge of the blade as you can get hurt, and the knife may not cut well as a result. If rust does appear, it is crucial to get rid of it as soon as possible. You can scrub the rust off with a non-woven scrub pad. For more advanced rust, we recommend using "Miracle Clean," an eraser-shaped product containing a course surface ideal for removing rust.

How to Care for Knife Handles
There are generally two types of knife handles. Japanese knives usually have their tang inserted into their handle. In contrast, Western knives tend to have their tang sandwiched between two plank-shaped pieces and fastened with screws.

Handles used on Japanese knives can usually be replaced. If a handle is damaged, it should be replaced as soon as possible. Otherwise, moisture may penetrate, causing the tang to rust. This can result in cracks developing. Eventually, the rust may weaken the tang to the point where it breaks during regular use. Western knives can also rust at the handles if they're not cared for properly. When this happens, the handle tends to bulge, creating a gap. This allows the entry of dust, ingredients from cooking and other particles. In severe cases, the screws may come off. Thus, it is crucial to always dry your entire knife, including the handle.
How Often Should You Sharpen Your Knife?
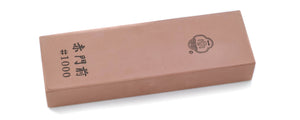
We recommend sharpening your knives diligently. Don't wait until your knife starts to feel blunt, as it will likely be already damaged by then. Regular sharpening of a blade will help prevent damage, which in turn makes it easier to sharpen. If you sharpen the blade very thin, it may cut well but will be prone to chipping as a result. On the other hand, a thicker knife may not chip as easily but won't cut as efficiently. To achieve an ideal balance, it is essential to first understand the basics and apply the right sharpening methods and angles. You can achieve better results by using a variety of whetstones. We recommend you carefully experiment with coarse, medium, and fine grit whetstones.
How to Sharpen Your Knives - Basic Sharpening Techniques
Always hold the knife so that the blade is in front of you, tilted at an angle of 45-degrees to the whetstone. Apply force when pushing forward. Sharpen with a back and forth motion. When you sharpen the face (right side) of a right-handed knife, grasp the handle with four fingers from your right index finger to the little finger. Place your thumb on the heel of the cutting edge as though you are pushing it down. Press your left hand on the cutting edge of the kitchen knife (the part that is pressed will be best polished.) For the reverse side (left side,) flip the knife around and hold it reversed. To achieve the best results, it's better to use three types of whetstones: coarse grit whetstones (around No. 200,) medium grit whetstones (around No. 1000,) and fine grit whetstones (around No. 3000 to 6000.) For home use, there is a type of dual whetstone that comes with both No.1000 and No. 220 grits. Before use, soak the stone well in water and add water when in use. Place a piece of cloth under the stone to prevent it from moving.

How to Sharpen Double Bevel Knives
In the case of double bevel knives, sharpen the face side of the blade by 70% and the reverse side by 30%, achieving a slightly rounded cutting edge. Observe the polishing marks to decide the optimal sharpening angle and width. You want to see polishing marks appearing about 5mm to 10mm from the cutting edge. Using the coarse grit whetstone first, thin the blade slightly - about 10 mm from the cutting edge. At this point, you are already 90% done. Next, change to a medium grit whetstone. Work on sharpening half the width that you have achieved with the coarse grit stone by holding the knife at a slightly steeper angle. Continue until burrs are drawn on the blade. If you can’t seem to draw a burr, hold the blade at an even steeper angle and sharpen until burrs are visible. When you have successfully drawn the burr, flip the knife to work on the reverse side. Finish off by removing the burrs.
How to Sharpen Single Bevel Knives
For single bevel knives, sharpen the cutting edge from the face side. Place the blade on the whetstone, face side down. Push the cutting edge such that the entire blade is pressed against the stone. This is the sharpening angle. Sharpen the whole blade with the stone. Next, change to the medium grit whetstone and work at it until you draw a burr. Make sure you push the blade down firmly with your left hand so that it is in full contact with the stone. When you have successfully drawn a burr, sharpen the reverse side of the blade lightly. Be sure to check if the surface of the whetstone is flat when you work on the opposite side. As far as possible, use a fine grain sharpener and be sure not to over sharpen the reverse side of the blade, as this will make the knife less durable.
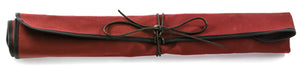
How to Store Knives
If you are moving locations or aren't intending to use a knife for an extended period, you should follow the steps below to store it. The aim is to prevent rust and other damage. First, clean your knife thoroughly with mild detergent and rinse it in warm water. After wiping it dry with a clean and dry cloth, allow it to air dry. After confirming that all parts of the knife are completely dry, you should apply knife oil to the blade. Knife oil is tailored specifically to protect knife blades while being easy to clean off before the next use. Do not be tempted to substitute another type of oil, as this could have unintended consequences. Once the blade is thinly and consistently coated in knife oil, wrap it in dry newspaper and store it in a place with low humidity.

How to Sharpen a Knife - For Professional Use
Below are instructions on how to sharpen various types of chef knives. Please try them out and compare them with your own style of sharpening. Our cooking improves when we take good care of our tools. Be sure to sharpen your knives before they get blunt. If you visit Osaka, please feel free to drop by our store, watch how we sharpen knives and ask us any questions.
How to Sharpen a Single Bevel Japanese Knife
Single bevel knives come with a blade ridge, which is the blade's flat surface that runs from the ridgeline to the blade's edge. When the knife's reverse side is over-sharpened, the steel becomes too thin, and the knife's durability will be affected. To retain the hardness of the steel, be sure to sharpen gently. The diagrams below show the vertical cross-section of a blade.
1. A knife that does not cut well has become rounded at the edge.
Sharpen the rounded portion with a medium grit whetstone, with the knife at a slant of about 45 degrees. Keep going until you reach a double-stage blade. Now, correct the shape and the nicks. The roundedness will be taken off when burrs are drawn. Place the blade flat against the stone on the reverse side and glide it across lightly to remove the burrs.
2. Sharpen the entire blade ridge with a coarse grit whetstone until the double-stage blade is straightened out.
Stop when the line is gone. That means that the entire blade will have an even and flat appearance. A wider blade ridge cuts better, but the blade chips easily. A narrow shinogi blade ridge means the knife does not chip easily, but sharpness will be compromised. Make adjustments according to how you use the knife so that it is convenient for you. At the time of purchase, our knives are built with an average width. The blade ridge is made up of two pieces—around 1/4 of hard steel and about 3/4 of soft metal. If the knife is sharpened in a uniformed manner throughout, the more malleable metal will be reduced more than the steel. This might cause the blade ridge to be broader, thus changing the shape of the blade. It is easier to decide the sharpening angle by exerting force with your right hand, lifting the knife to create an opposing force.
3. Sharpen the entire surface of the blade ridge with a medium grit whetstone.
The surface that has been polished with the coarse grit whetstone will have many rough scratches. Go on polishing till the marks disappear. However, this does not mean you have to sharpen until burrs are drawn.
Hamaguri sharpening refers to a blade in which the cutting edge curves slightly, with a bulge like the surface of a clamshell. To create a clam-shaped blade, sharpen the cutting edge by raising the knife and lightly work to draw the secondary bevel (a 'gentler' double-stage blade.) Keep going until burrs are drawn. This secondary bevel is sharpened by holding the knife in an angle that is half of the blade ridge. When the double-stage blade is straightened out, stop sharpening and remove the burrs. Now you will have a well-sharpened knife.
4. To achieve an even better cutting performance, polish with a fine-grit whetstone.
Grind the secondary bevel with the fine grit whetstone to sharpen the cutting edge (finer than the secondary bevel made with the medium grit stone). Sharpen the shinogi blade ridge in such a way that the secondary bevel is straightened out. Sharpen the steel edge at a steeper angle at the cutting edge. When the secondary bevel is straightened out, complete the process by polishing off the burrs. The trick to sharpen only the steel part is when you are sharpening steel, it will feel as if it is slipping off the whetstone. Try to discover this boundary line.
The sharpening method introduced here refers to sharpening relatively new knives. A new kitchen knife has a firm concave back. If you polish the blade ridge flat at this point, the cutting edge will become too thin, and the knife will not last long. A stronger cutting edge will be obtained if you aim for a clam-shaped blade as introduced above. On the other hand, a used and seasoned knife will have a narrower width, a smaller concave back, or a concave back, which has been thinned by over-polishing. In such a case, sharpness cannot be obtained unless the entire concave back is polished flat.
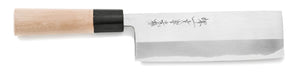
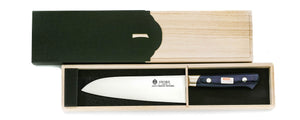
How to Sharpen a Deba Knife
Deba knives are for cleaning and cutting fish. They are made thicker to enable cutting hard bones and designed as a single bevel blade that is suitable to fillet fish into three slices. Thus, a single knife must have a sturdy part that can cut hard objects and be sharp enough to fillet fish into said three slices. Generally, you want to sharpen the blade edge to fillet fish slices and grind the heel of the cutting edge thick enough to cut hard objects such as bones. The cutting edge also starts from being narrow at the heel to become broader at the blade edge.
The sharpening procedure is the same as that for a Japanese single bevel chef knife. First, the cutting edge must be aligned through sharpening.
To avoid making the blade thinner than necessary, take note of how it has been sharpened from the cutting edge to not to widen it, and end it off with a clam-shaped blade. Complete the process by ensuring that it has a large clam-shaped blade compared to other Japanese knives. When you are done sharpening the cutting edge, you can grind its heel into a double-stage shape and yield a knife that does not chip easily even when cutting bones. To create the double-stage blade, use the medium grit stone, place the knife at 45 degrees against the stone and exert force from the heel of the blade as you sharpen along. Deba knives have an arc from the blade's heel to its cutting edge. You can obtain a double-stage blade by exerting force from the heel during sharpening, keeping 1⁄4 or 1⁄5 of the blade in contact with the whetstone.
When doing so, if you don't maintain the angle consistently, you will end up with a curved knife, which is difficult to cut with, so be careful. Some people think it is good enough just to have a sharp edge for cutting, so they sharpen only the cutting edge of the Deba knife. By doing so, only the cutting edge will be reduced while the heel of the blade remains thick. This will destroy the shape of the Deba knife, rendering it challenging to use with a triangular shape and decreasing its durability. If you sharpen the entire blade to keep its form and create a double-stage blade only at the heel, it will be easy to use and last longer.
There are different types of Deba knives:
- Hon-Deba knives are for general use
- Slightly thinner Ai-Deba knives are mainly used for cleaning fish
- Thinned Mioroshi-Deba knives are also used for cleaning fish
There are many types of professional knives, such as those used for pufferfish or salmon. It is important to select the right knives according to ingredients and usage.
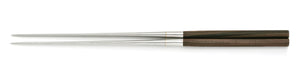
How to Sharpen a Yanagiba Knife (Sashimi Knife / Sushi Knife)
The Yanagiba knife is a sushi knife. It has single bevel and is used to cut thick strips and sashimi.
For sashimi, it is best to slice with a singular stroke. If you have to make a second cut, it will not be a clean one. As such, it's best to use a knife with a blade that is longer than the food.
The sharpening procedure is the same as that for a single bevel Japanese knife described above. Align the cutting edge and the shape and start to sharpen from the cutting edge. Basically, you should sharpen to obtain a hamaguri clam-shaped blade. But, as this knife requires sharpness, polish the blade flat when you use the coarse grit and medium grit whetstones. When you finish off with the fine grit whetstone, form the cutting edge by obtaining a light hamaguri clam-shaped edged blade.
Please be very careful not to destroy the shape of the blade. You may come across cases where your knife will have a tip that is reversed, somewhat like the nose of a Concorde aircraft. This is because the tip does not come in contact with the whetstone. Yanagiba knives have an arc and a pointed tip. Therefore, merely pressing down on the tip does not make the tip come into contact with the whetstone. Instead it will sharpen at around 2 to 3 cm from the tip, giving that Concorde-esque appearance. In order to ensure contact along this arc with the whetstone, hold your right hand (which is at the position of the handle) at a position higher than when you are sharpening the heel of the blade. If you go downwards as you sharpen the middle, you will sharpen along the shape of the arc, preventing the shape from distorting.
It's said that when sashimi is cut with a good knife that cuts well, it will taste way better. As such, not only is it important to sharpen well, but it is just as important to do a thorough job of polishing with the fine grit whetstone. After polishing, you will obtain a delicately finished blade at the cutting edge that slices through sashimi beautifully, resulting in sashimi that is pleasant to the palate.
In addition, Fugubiki knives which are thinner and lighter than Yanagiba knives are much easier to use for cutting thin sashimi slices.
How to Sharpen an Usuba Knife
The Usuba knife means "thin blade" in Japanese. It is ideal for cutting and julienning vegetables. There are two types, the Kansai type (sickle type,) and Kanto type (rectangular type). Both of them have no difference in the application or sharpening methods used. The sharpening procedure and types of stones are no different from what you would do with a Japanese style single bevel knife.
Despite popular belief that the cutting edge should be flat and straight, a blade that is just slightly curved will make it easier to operate. That means the blade center touches the cutting board while the heel and the tip are slightly raised. Such a blade ensures smoothness when cutting vegetables as it does not get caught easily. It can also do an excellent job at peeling and julienning. Another benefit is that these knives don't dent easily at the cutting edge. When preparing the cutting edge, sharpen it so that the middle part protrudes slightly. Depending on your preferences, knives that are rounded only at the cutting edge may be good too.
If you do not make a conscious effort to create a clam-shaped edge, it gets difficult for the cutting edge to make contact with the whetstone, causing the cutting edge to expand. If the knife condition worsens, the boundary between steel and metal will reduce, eventually collapsing. When this happens, the damage to the blade will worsen, and it becomes very difficult to repair. Once the cutting edge is expanded, the knife's durability is severely reduced. As you sharpen an Usuba knife over time, the knife will become narrower and narrower. The knife will last longer if you sharpen so that the cutting edge narrows along with the knife's shape. After sharpening the steel part of the edge, we recommend that you grind the entire cutting blade to adjust the thickness before sharpening the edge again.
How to Sharpen a Double Bevel Japanese Knife
Double bevel Japanese knives consist of soft metal sandwiched between two pieces of hard steel. It is essential to sharpen both sides evenly to ensure symmetry using the following process.
1. As with the single bevel knife, use a medium grit whetstone for rounded parts and sharpen until you get a double-stage blade and burrs are drawn.
This will fix the shape and any chips in the blade.
2. Polish with the coarse grit whetstone.
Unlike single bevel knives, double bevel knives usually lack a clear blade ridge. The sharpening needed may differ depending on the size of the knife, but as a general guide, please sharpen 2cm from the cutting edge. Keep grinding both sides until the double stage blade is straightened. The shiny part at the cutting edge is steel, while the dull grey part is metal. Sharpen until you get about 3 to 4mm of steel. Work to ensure both sides are symmetrically sharpened. When the sharpened edge is too wide, the knife cuts better but chips more easily. On the other hand, while a narrow edge makes the blade more resistant to chipping, it may not slice as effectively. Adjust the width of the sharpened area to match your own usage and needs.
3. Polish the sharpened part with a medium grit whetstone until the scratches made by the coarse grit whetstone are gone.
Once done, stand the knife up and sharpen it to create a secondary bevel (smaller than the double stage edge). Hold the knife in an angle that is about half of what you have sharpened earlier and sharpen both sides until the secondary bevel is straightened out. If you just grind the broader side, the cutting edge may be over-sharpened, thereby becoming too thin and easily chipped, ruining your hard work.
4. Polish off with the fine grit stone.
Create a secondary angle at the edge (smaller than the secondary bevel you created with the medium grit stone.) Work on a lower angle than what you have done with the medium grit stone to straighten the secondary bevel. Only sharpen both sides of the steel part. Stop when the wire edge has disappeared.
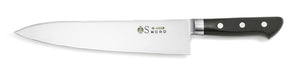
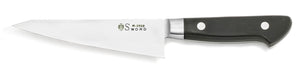
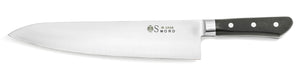
How to Sharpen a Western-Style Knife
Most Western knives have a double bevel, and most are generally not symmetrical. The right faces of most are rounded, while their left sides are slightly flatter. Following this, sharpen about 70% on the right face and about 30% on the left side. This will create an even more apparent hamaguri shaped blade.
1. Use the medium grit stone for the rounded part and grind a double stage blade from the knife's right until burrs are drawn.
This will fix the shape and any chips in the blade.
2. Using the coarse gritstone, work at about 1.5 to 2cm from the edge until it is straightened out.
Work at the right face until the line is almost gone, then move on to sharpen the left side. To determine sharpening width, work in such a way that the left face is resting against the whetstone, and the heel is rested with the tip slightly raised. It is essential to complete the sharpening process with the coarse grit whetstone to yield a blade that is easy to use. When the sharpened edge is too wide, the knife cuts better but chips more easily. On the other hand, while a narrow edge makes the blade more resistant to chipping, but it may not slice well. Make sharpening adjustments according to how you use the knife so that it is best for you.
3. Sharpen with the same principles using the medium grit whetstone.
When the grinding is completed, you can start to form the blade. Stand the knife from the right face and sharpen to create a secondary bevel (smaller than the double stage edge). Hold the knife in an angle that is about half of what you have sharpened earlier on the right face and keep on sharpening until the secondary bevel is straightened out. Remove the burrs on the left side. Now you will have a knife that cuts well.
4. To increase the cutting performance, complete the process with a fine-grit whetstone.
Create a secondary bevel at the edge on the blade's right face (smaller than the secondary bevel you created with the medium grit stone). Work on a lower angle than what you have done with the medium grit stone to straighten the secondary bevel. Raise the blade to a steeper angle and sharpen about two times. This creates an even more durable hamaguri shaped blade. When the wire edge has disappeared, work on the left side to remove the burrs. The number of times to sharpen is the same with the coarse grit whetstone and the fine grit whetstone to reach 70% on the right face and 30% on the left.